
Auto-GPT and Autonomous Artificial Intelligences
robort - 2023-04-29 19:56:23
Typically the interaction with chatbots based on generative models is based on sending prompts . The user makes a request and receives a response from the service, for example ChatGPT or Bing Chat which, by the way, is also based on GPT. At this point, the system leaves the session open, waits for further inputs (the prompts, in fact) to continue the conversation, deepen what was stated in the previous output or correct any inaccuracies.
A different approach provides instead that the user can plan objectives and let the model operate automatically on his behalf. In this regard we are not simply talking about "AI" but more properly about Autonomous AI Agent , as in the case of Auto-GPT. Specifically, it is an Open Source platform, for the moment still in an experimental phase, designed to link the "thoughts" of GPT-4 so that it is able to achieve the result expected by the user on its own.
Advantages and disadvantages of Auto-GPT
Compared to ChatGPT, Auto-GPT also has the advantage that it can connect to the Internet and analyze web pages in their current state. This allows you to receive updated information as an output. Add to this the fact that to install and use it you don't need to have a particularly advanced terminal, you just need a PC or Mac equipped with a processor, RAM and GPU sufficient for common development and productivity activities.
As anticipated, this is an application optimized for GPT-4. If you don't have access to the latter's API, you can still operate with GPT-3.5, however, bearing in mind that the outputs may not be as precise. An additional caveat concerns the consumption of tokens. Working autonomously, Auto-GPT tends to consume them in large numbers. It is therefore advisable to set precise limits using the configuration file that we will analyze shortly.
Requirements to install Auto-GPT
The installation example proposed in this lesson concerns the Windows environment , however the software requirements are the same also for those who work on Linux or macOS based operating systems .
Python from Git
The first step is to verify that a working Python environment is present and active on the terminal . So let's launch the control command from PowerShell, Terminal or Shell:
python --version
If sending the instruction should generate an output like the following you can continue, otherwise you will have to proceed with the installation of Python .

In the same way you will have to verify that pip , the Python package installer, is installed on the system:
pip --version

If the latter is absent, it will in fact be necessary to install it.
Finally, Auto-GPT requires the presence in the system of DVCS ( Distributed Version Control System ) Git , for whose installation (very simple) I refer you to the appropriate guide.
Auto-GPT: Setup
The developers of Auto-GPT provide compressed archives in different formats in which all the application files are present.

Once the archive of our interest has been downloaded, for example the one in format .zip, it must be unpacked. The result is a folder to be placed in a position of your choice. Inside it is the named file .env.templateto be opened with your favorite code editor.
The Auto-GPT configuration file
Specifically, this is the Auto-GPT configuration file which, among the various directives, also has the one where to indicate the OpenAI API Key to be used for interacting with GPT.
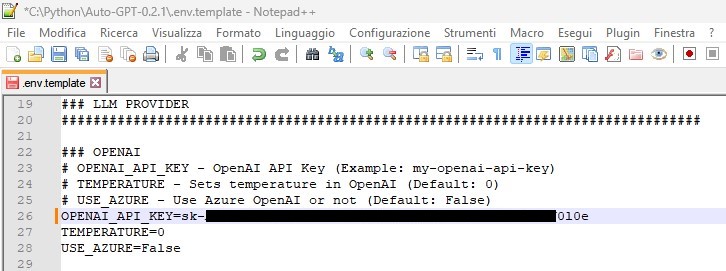
Here you will find the instructions for quickly generating the API Key. OpenAI also provides a limited time free credit that allows you to test your interfaces.
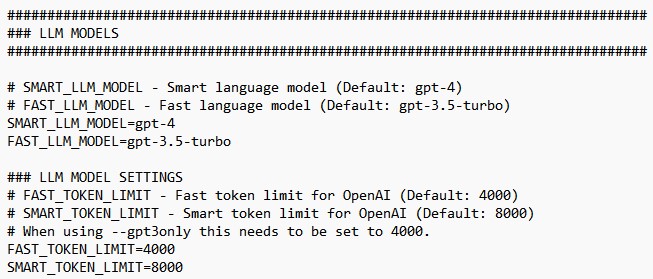
Also in .env.templateit is possible to set the generative models to be used (indicating the most "intelligent" and the "fastest") as well as the token limits for each of them.
Auto-GPT e vector database
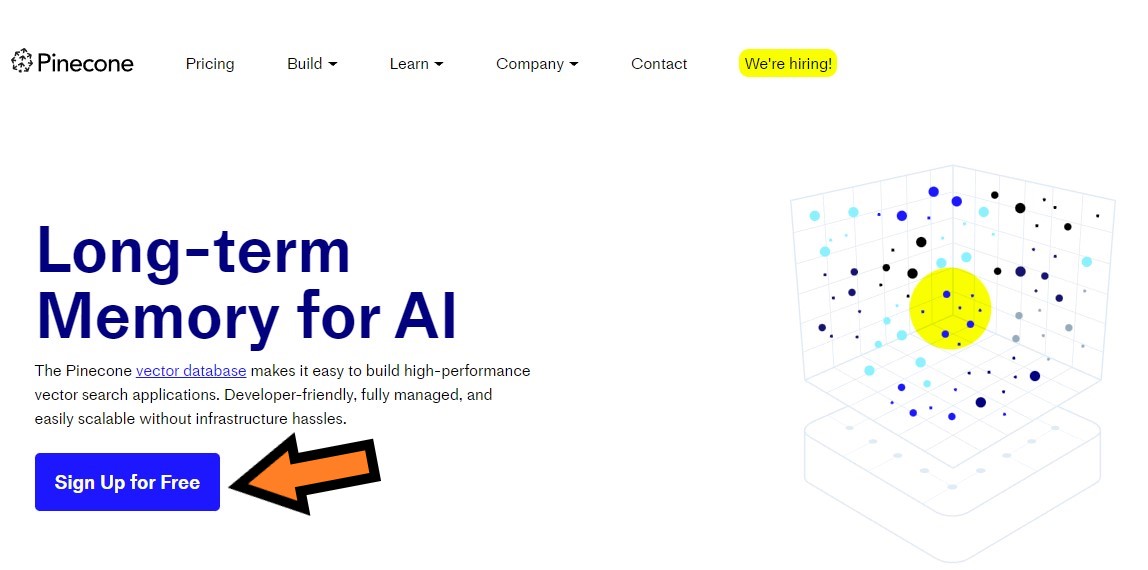
To make your Auto-GPT instance even more performing, you can also authenticate yourself to a long-term memory service for AIs , such as Pinecone , which allows you to create a free account.
Once the registration is complete, you can request an API Key to which you can give a name (for example " autogptkey") before clicking on "Create Key".
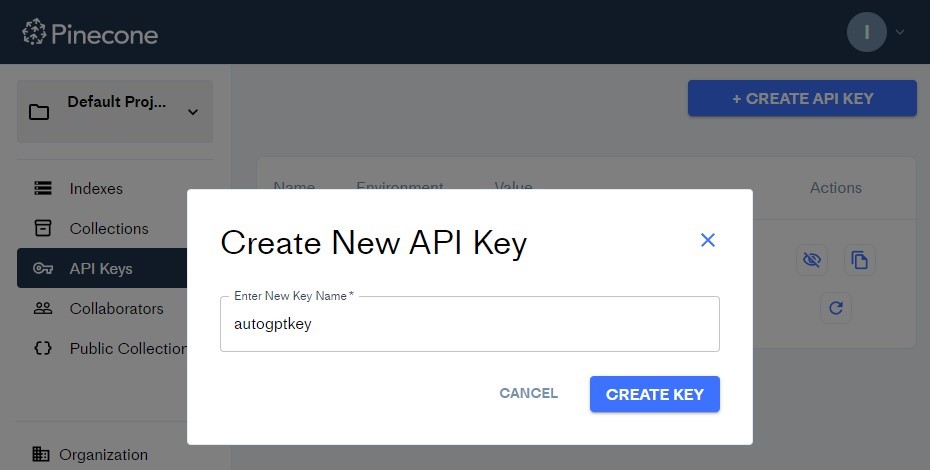
The key thus generated can be copied from the "API Keys" section of your personal page on Pinecone:
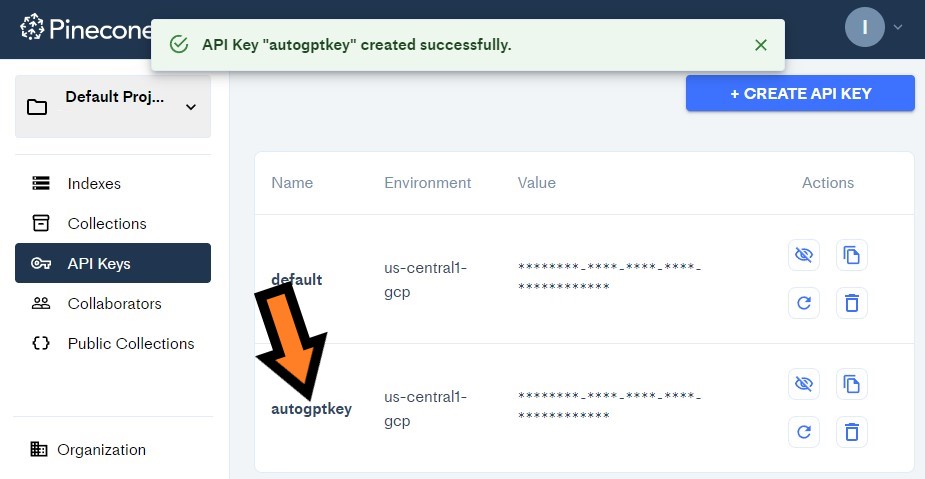
This information must then be indicated in the appropriate section of the file .env.template, also specifying the geographical area for the connection which is set by default with the parameter us-central1-gcp.

However, Auto-GPT is compatible with other storage media such as Redis, Milvus and Weaviate. If you have been using different vector databases for some time, it is therefore possible to take advantage of an alternative solution to Pinecone.
Auto-GPT: Installing dependencies
Once the previously indicated changes have been made, it is possible to save them and then rename the file .env.templatewhich must simply be called .env. Once this is done, the next step consists in moving to the path where the folder containing the application package has been saved.

From this location you can install all the dependencies needed for Auto-GPT to work. Being very numerous, they have been listed in the file called requirements.txt, this allows us not to have to install them one by one. In fact, to integrate them all into our system, it is sufficient to recall them all via pip using the command:
pip install -r requirements.txt
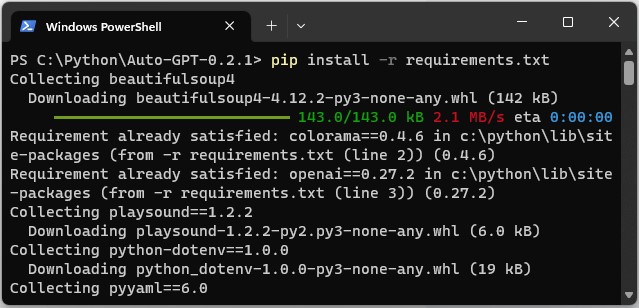
This operation may take a few minutes due to the quantity and size of the packages that need to be downloaded and installed. Hopefully Auto-GPT should be ready to start with the command:
python -m autogpt
In response, the application should show us a short welcome message, then asking us to give a name to our AI ("Watchman" in the example):

Conclusions
In this lesson we learned how to install and configure Auto-GPT, a free application that allows you to use the GPT generative model, letting it work automatically for you. Auto-GPT can be defined as an Autonomous Artificial Intelligence, or more properly as an experiment based on it. Testing it opens the door to the so-called AGI ( Artificial General Intelligence ), in the next lesson we will therefore see how to exploit it to improve our productivity, both in the search for information on the Web and for tasks related to development and programming.
